
Key takeaways:
Creating professional invoices ensures you get paid faster and keeps your service business running smoothly.
- Use a detailed and consistent invoice template. Include essential elements like your business information, client details, invoice number, dates, itemized services, total amount due, and payment instructions to minimize errors and save time.
- Clearly outline products, services, and payment terms. Itemize all work completed with clear descriptions, quantities, and costs, and specify due dates, payment methods, and any late fee policies to avoid confusion and encourage prompt payments.
- Personalize invoices for a professional touch. Add your logo, a thank-you note, and relevant offers or requests to build trust and promote client loyalty.
- Leverage digital tools and invoicing software. Sending digital invoices and using software like Jobber can automate reminders, track payments, and reduce mistakes—helping you scale and streamline invoicing as you grow.
- Follow best practices to get paid faster. Send online invoices, offer multiple payment methods, and keep payment terms clear and concise to maintain consistent cash flow and make payments easy for clients.
Want more tips to simplify your invoicing and grow your business? Sign up for the Jobber Newsletter.
Originally published in April 2019. Last updated on September 30, 2025.
Knowing how to write an invoice encourages clients to make timely payments, improves cash flow, and keeps your small business finances organized.
Use these tips to learn how to write up an invoice that can get you paid faster, enhance your professionalism, and support a stress-free payment process.
Learn how to prepare an invoice:
What is an invoice?
An invoice is a document you send to a client to request payment for your services. They’re typically sent at the end of a job or service and include all the information a customer needs to pay you, such as:
- A list of services rendered
- The total amount due
- The payment due date
- How to make a payment
For example, you would send a final invoice once a job was finished, like a one-off appliance repair. But for ongoing services, like weekly mowing, you would send recurring invoices, usually on a weekly or monthly basis.
Service invoices can be sent via email, text message, or lettermail. You can use any word processor to create an invoice—but if you’re handling a large volume, it might be worth investing in invoicing software.
How to write an invoice
Follow these steps to create an effective invoicing strategy for your service business.
1. Make an invoice template
Invoice templates save time and prevent errors. Make an invoice template you can reuse for each client that includes:
- An invoice number
- The customer’s information, including name and address
- Your business name, logo, and address, as well as contact information
- The services rendered
- The payment due date
- Any discounts, taxes, or fees
- The total amount due
- Payment terms and instructions
You can make your own template in Google Docs or Microsoft Word, or use Jobber’s free invoice template to quickly fill in your job details and automatically generate your invoice.
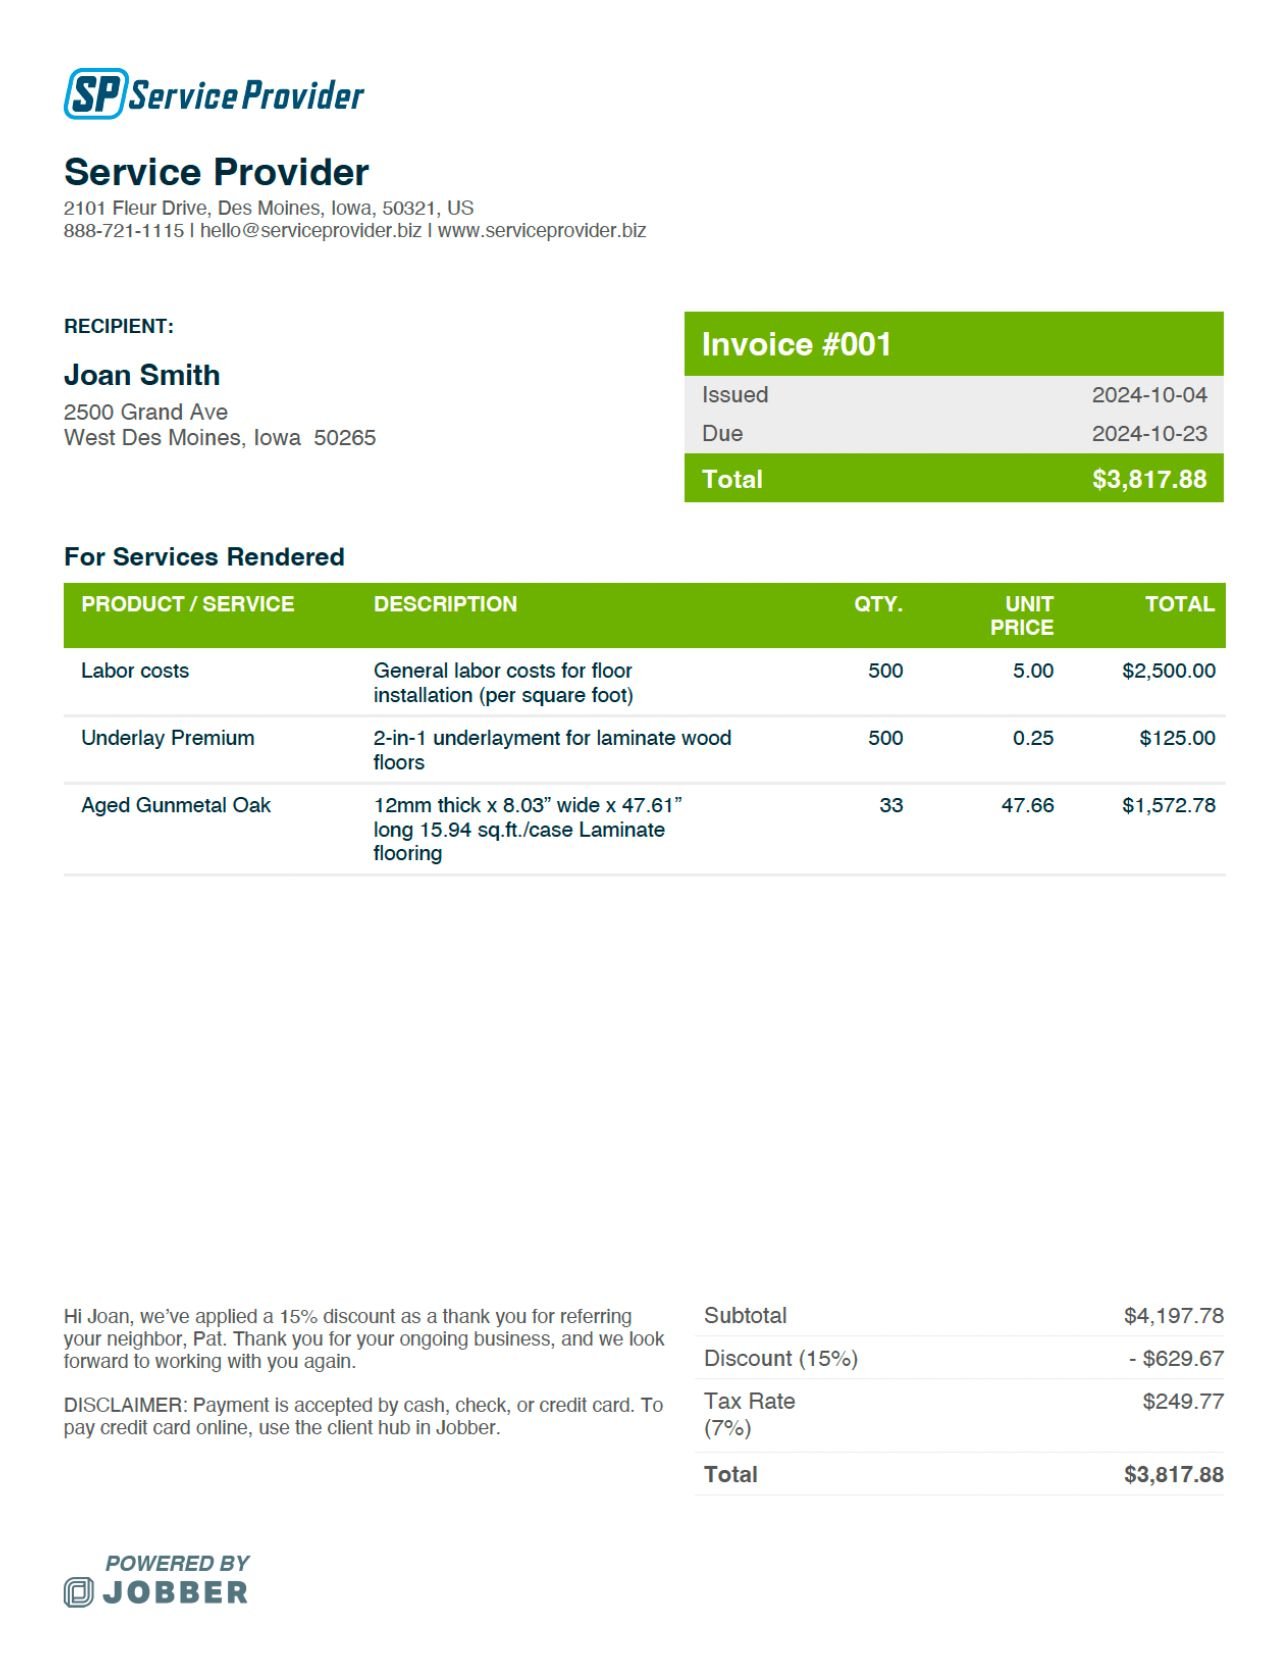
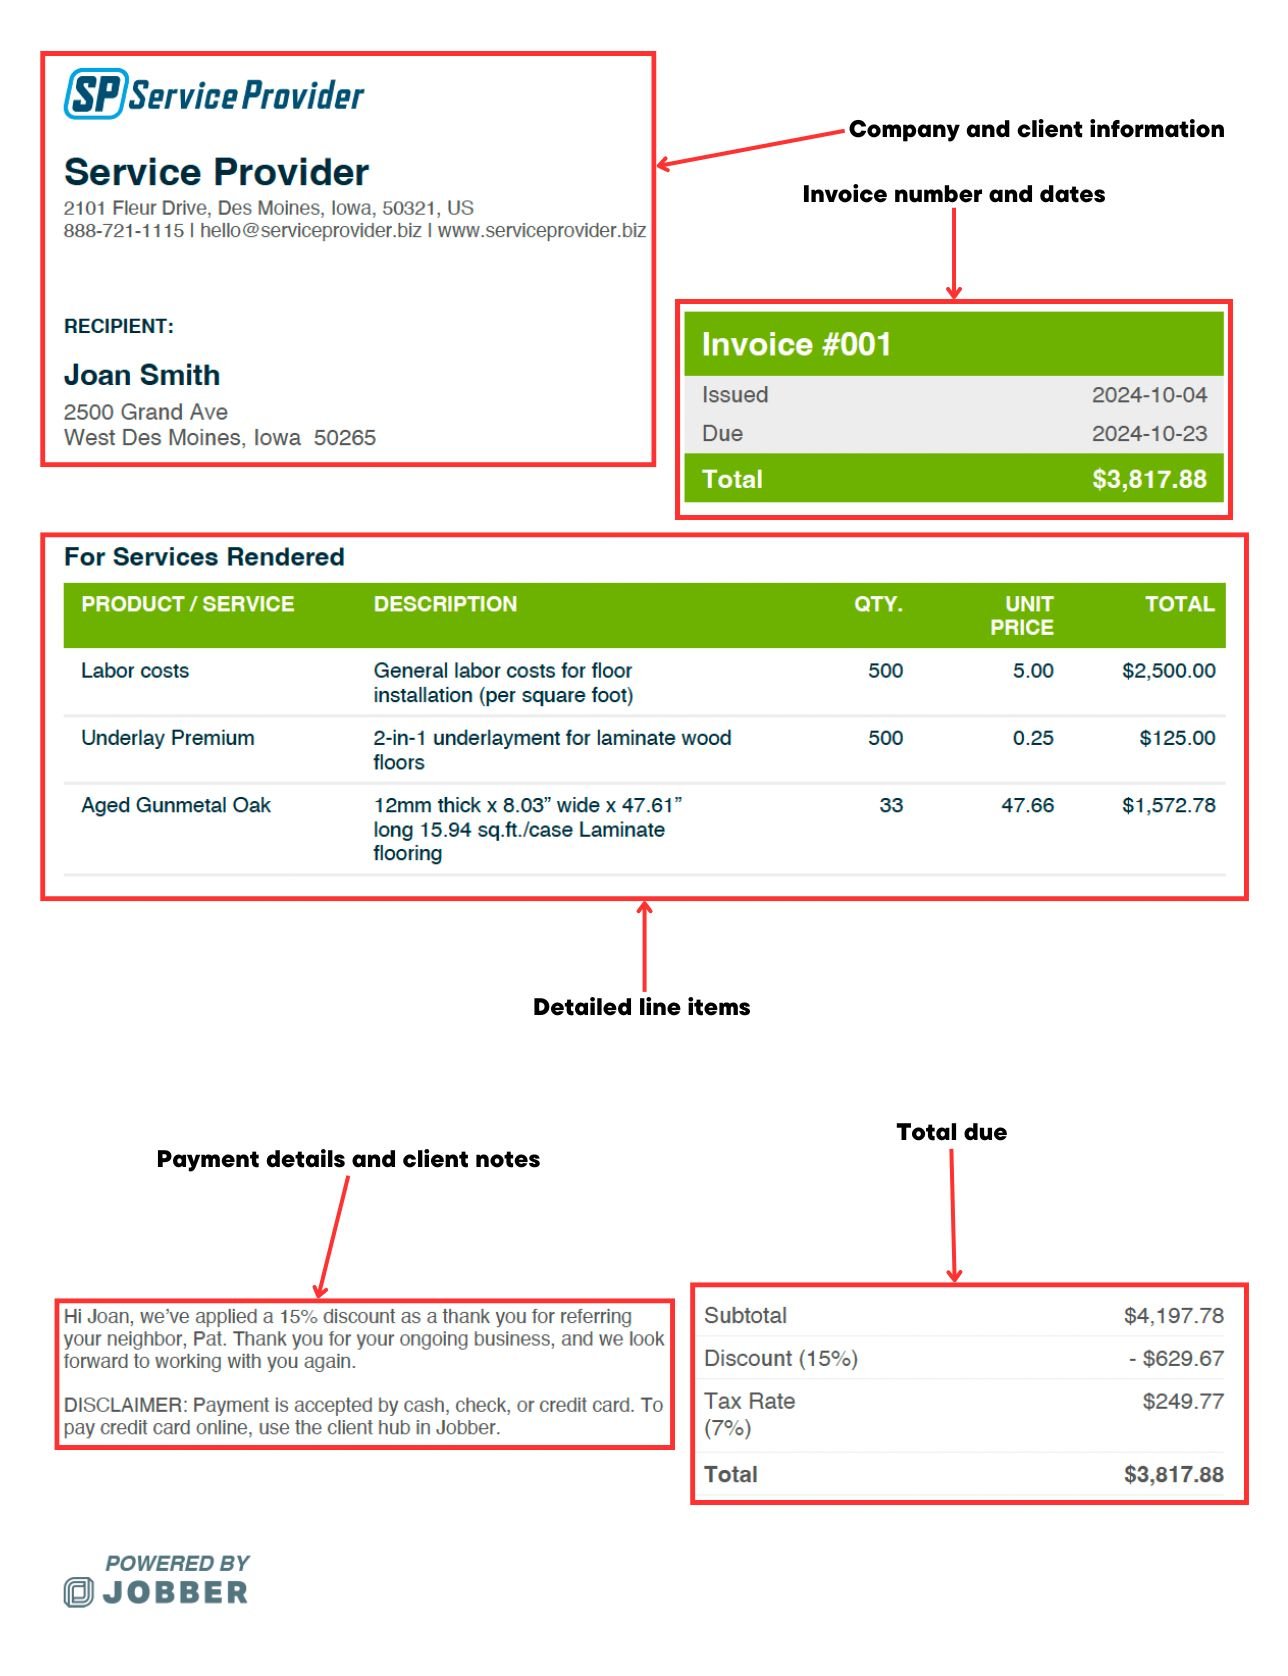
Here’s an example of an invoice created using Jobber’s free invoice generator.
READ MORE: 6 best invoice apps for field service pros
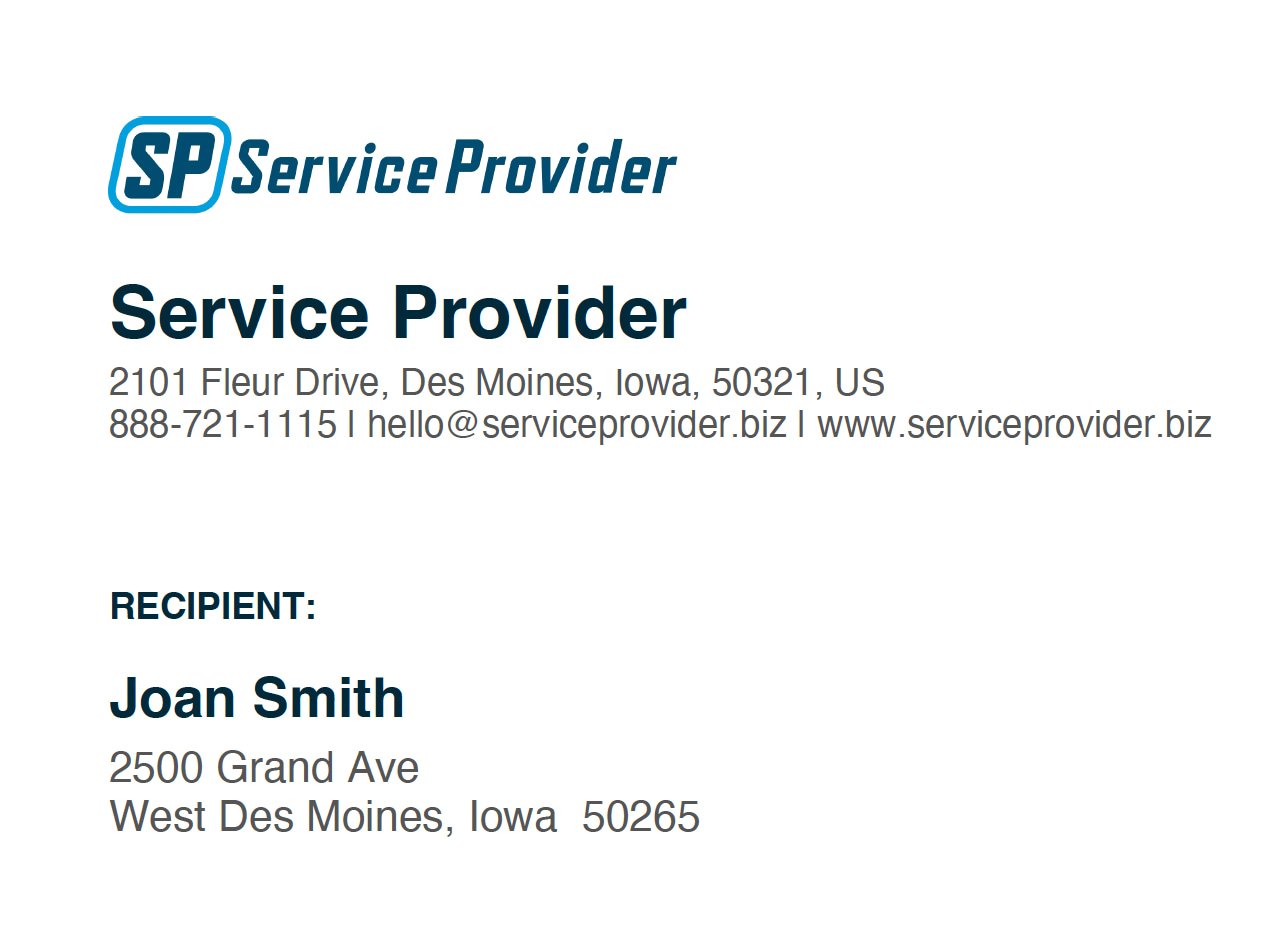
2. Add your company and client details
Once you have a blank template to work with, it’s time to fill it in. Start by adding company and client details, such as:
- Your business name and address
- Your phone number, email address, and website
- The client’s name and mailing address
- The service address
Pro Tip: Add your logo to the top left corner of the invoice if you have one. It’ll look professional and help you build some brand recognition.
Pro Tip: With Jobber’s invoicing software, you can add your logo and brand colors to your invoice to make it more memorable to clients and to help establish your brand.
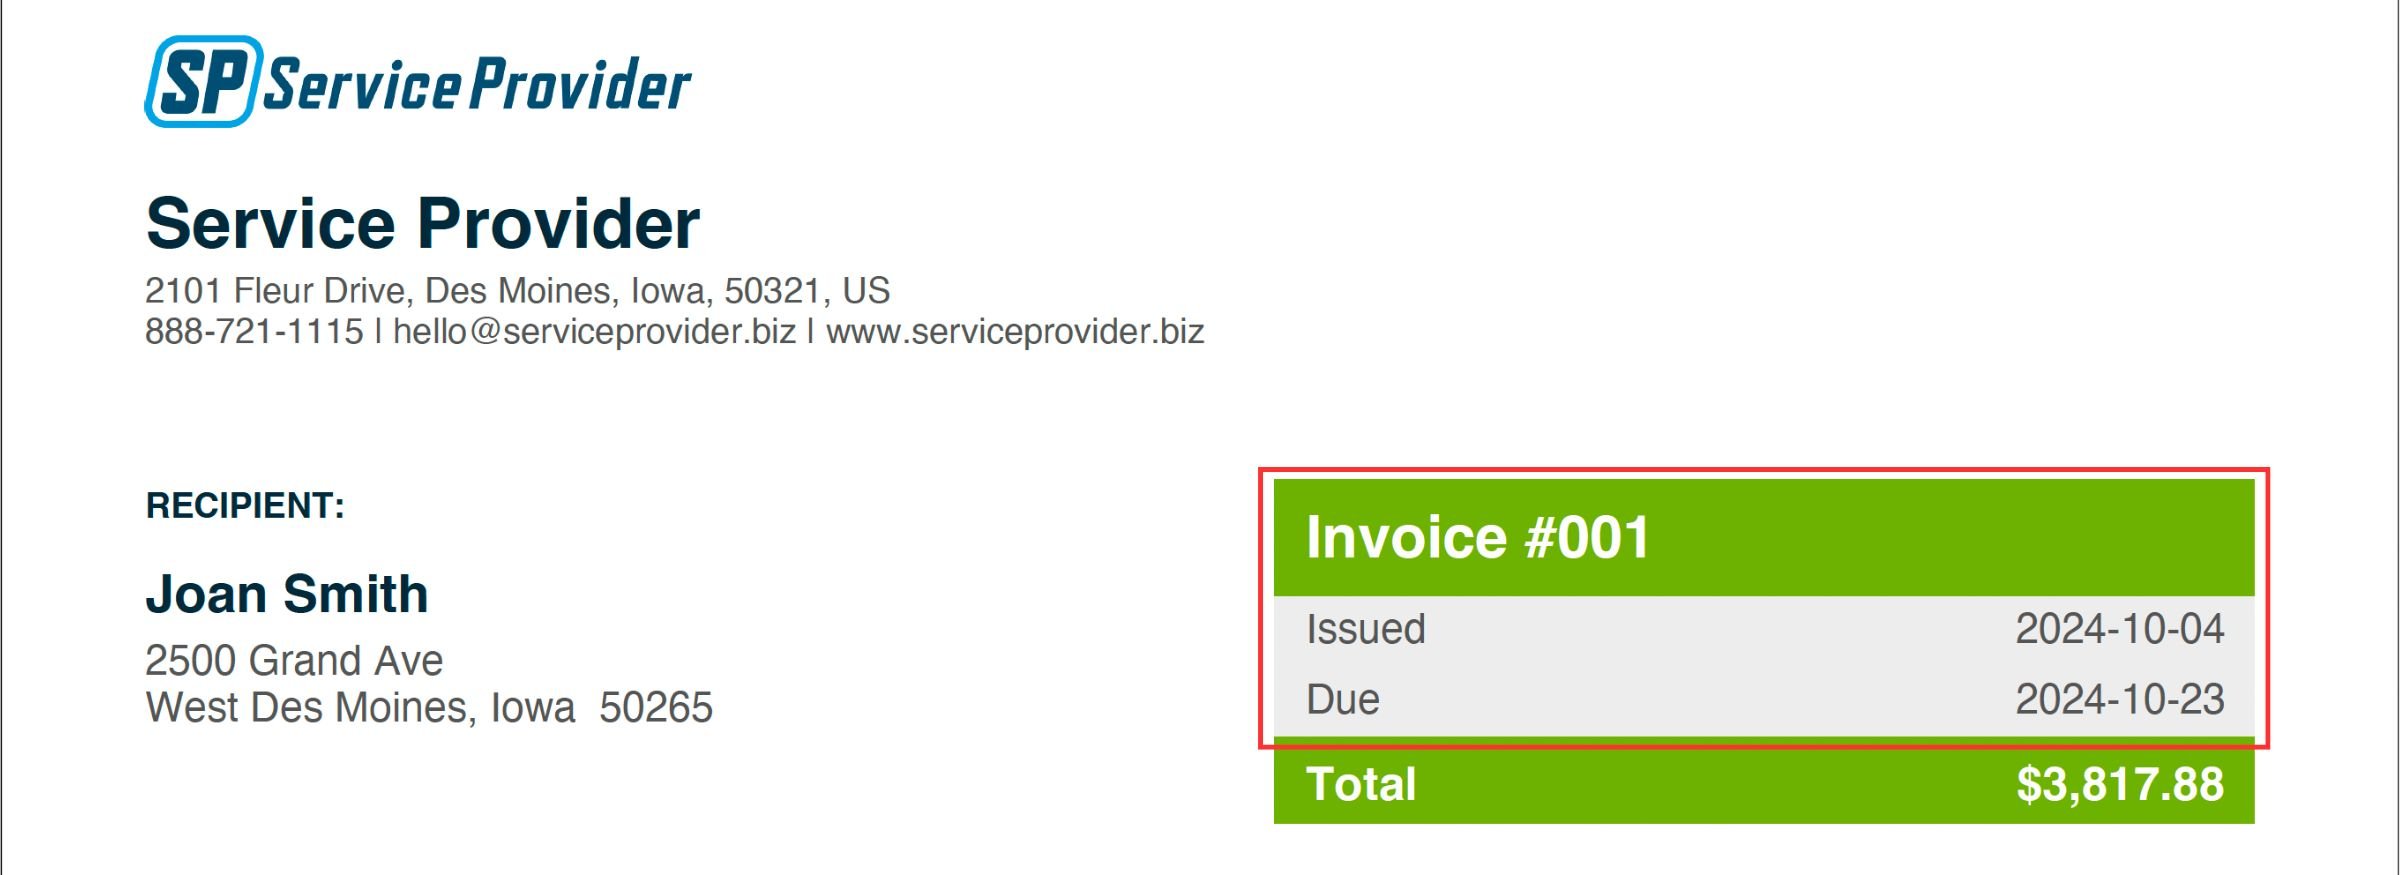
3. Add a unique invoice number and dates
Three of the most important parts of your invoice are:
- The invoice number
- The invoice date
- The payment due date
The invoice number and invoice date are for your records. They help keep you organized, making filing taxes, organizing recurring invoices, and tracking jobs easier.
It’s important to use a unique invoice number for each client so you can link payments to specific invoices and track unpaid bills.
The payment due date tells clients when to pay their invoice to avoid late fees or interest charges. You can also use it to figure out when to send overdue payment reminders if a client hasn’t paid on time.
Most service providers put this number in the top right corner of the invoice so it’s clear and easy to find.
READ MORE: When to send an invoice to get paid faster
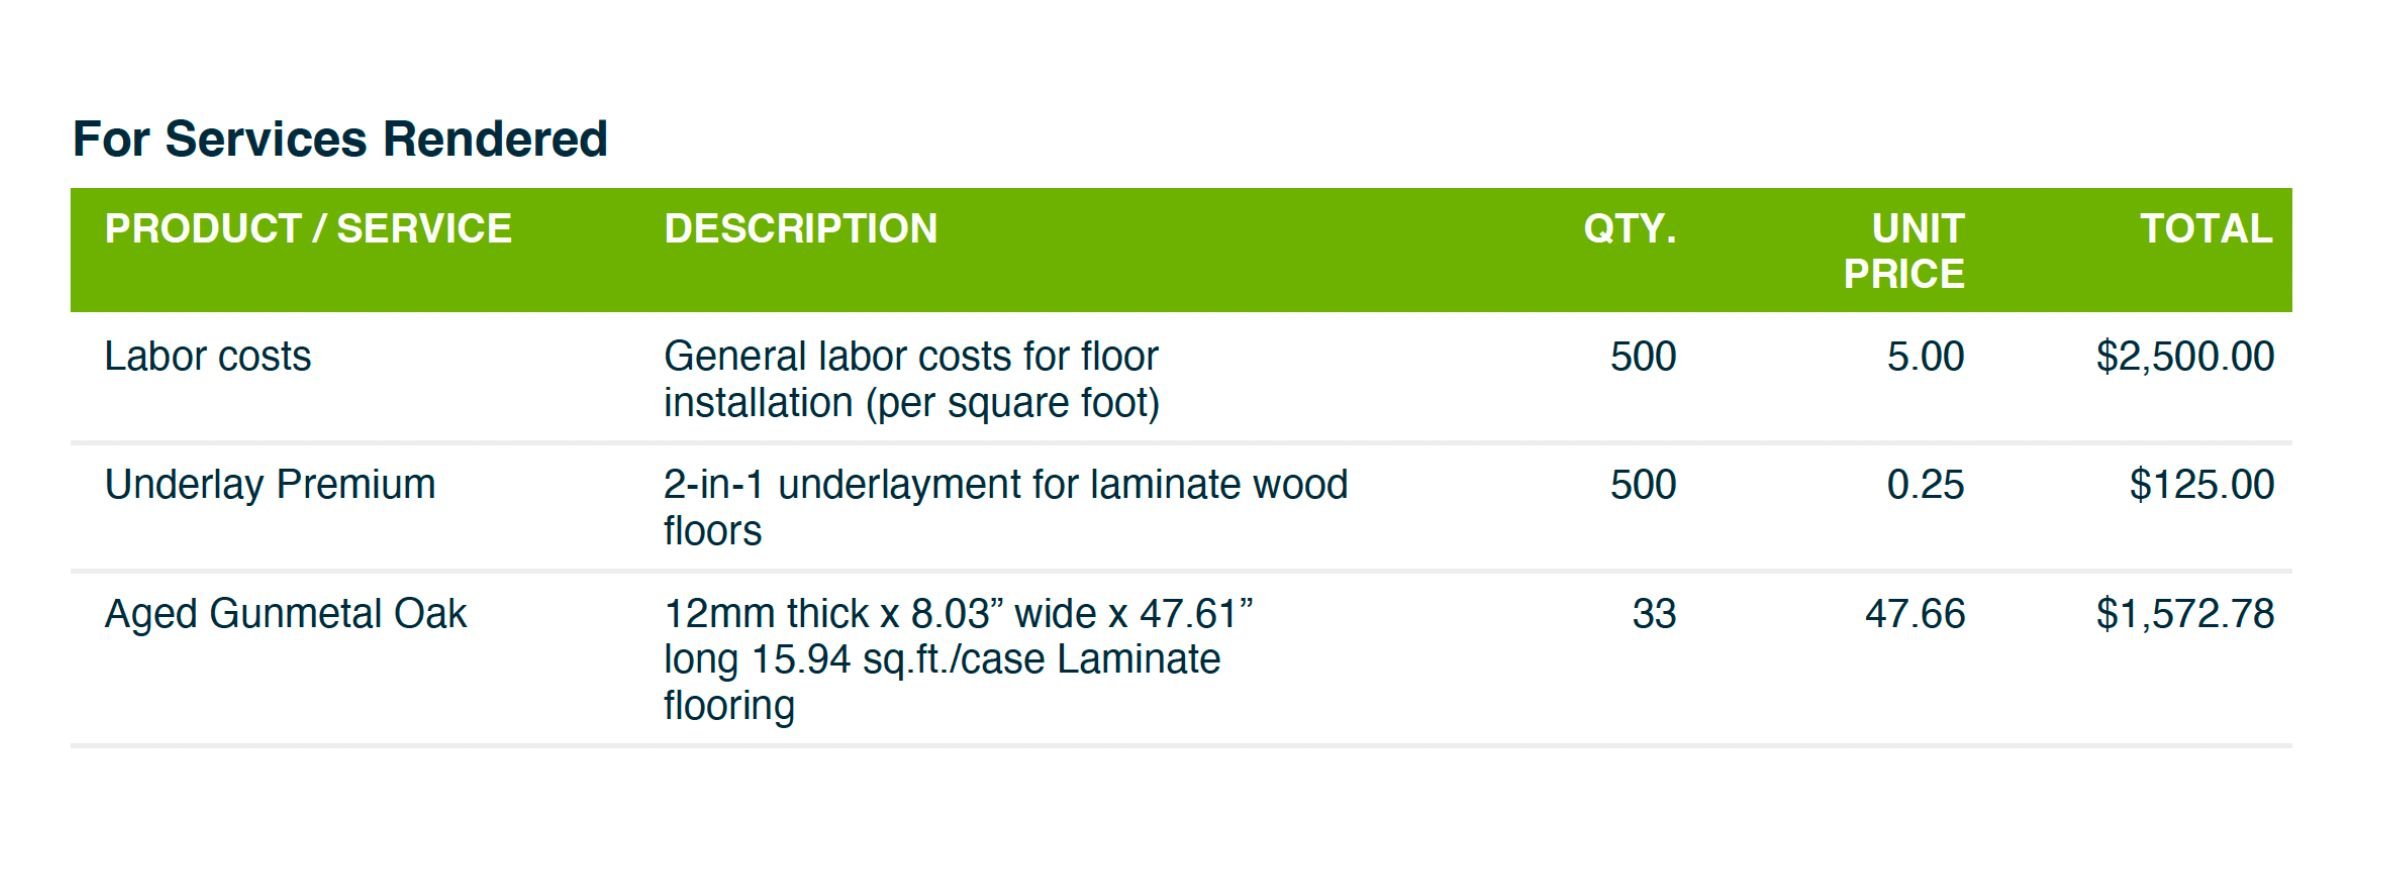
4. List the products and services sold
Next come your goods and services details. This information tells clients what they’re paying for and provides you with a record of what you did for them.
Be sure to include:
- A description of the product or service
- The quantity of labor or materials (for example, 3 hours or two bags of fertilizer)
- The unit cost of each item
Provide enough detail in the description so that the type of service or product you provided is clear to your client. For example, instead of writing “lawn treatment,” try “crabgrass control” or “grub prevention.”
In some cases, you may also want to include brand names or product descriptions, such as the make and model of laminate flooring you use in a client’s home. These details will give you a record of what was used in case of future repairs.
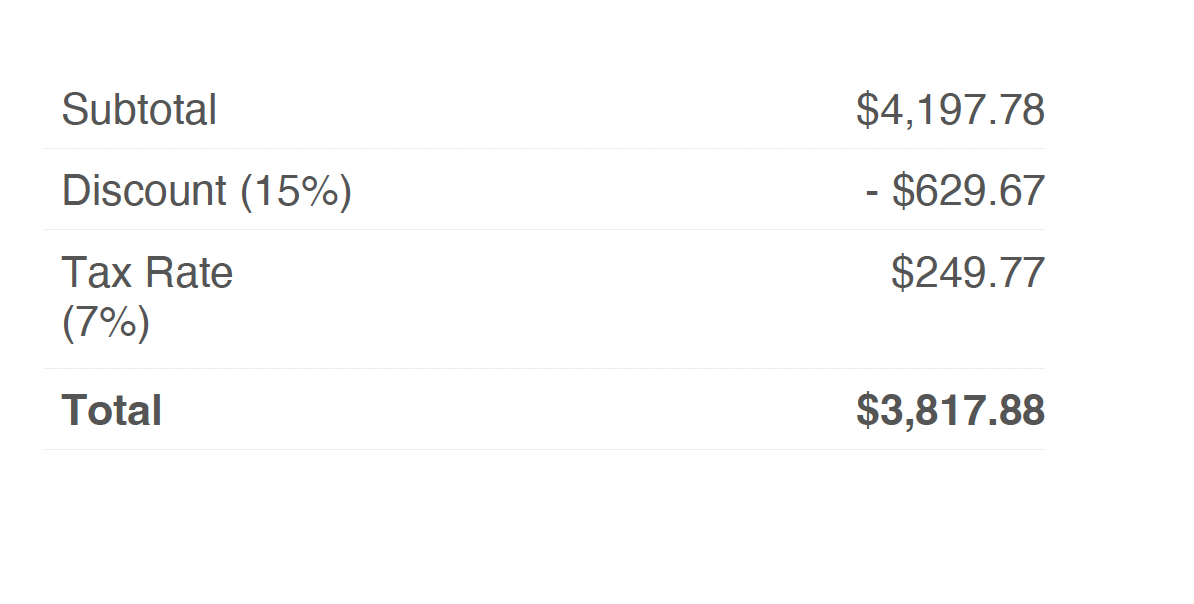
5. Determine the total due
The amount due on your invoice isn’t always the total of your products and services. It also needs to include:
- Deposits
- Taxes
- Fees
- Discounts
The total amount due is usually included at the bottom of an invoice, below the prices for each line item. It’s a good idea to put this number in bold to make it stand out.
6. Put in payment details
Payment terms outline payment-specific information, such as:
- Which payment methods you accept, and whether payments can be made online, in-person, or over the phone
- Whether you charge late fees or interest on overdue payments
- Any money-back guarantees or service warranties
Providing clear instructions helps your clients make a timely payment and ensures the payment process is as easy as possible.
Plus, it tells the client what to expect if a late payment is made.
Include payment information at the very bottom of your invoice, next to the total due for services rendered. If possible, add links to any relevant policies so clients can review them in more detail.

7. Show your gratitude
Invoices are the perfect place to express your appreciation. Leave a short thank-you note at the bottom of your invoice to make the client feel good about choosing to work with you.

This space is also a great place to mention other details, such as:
- Your referral program
- Any upcoming seasonal discounts
- A request for a review
Just make sure to stick to what’s relevant to the client so that the bottom of your invoice isn’t overloaded with too much information.
8. Send your invoice
After you write your invoice, it’s time to send it. While some clients may still prefer mailed invoices, most will expect to receive them via email or text.
First, save it as a PDF. This step will ensure it maintains its formatting and looks just as good to the client as it does to you. Then, email, text, or use Jobber’s invoicing software to send it on its way.
What does an invoice look like?
When you combine all of the elements above into a single invoice, your final PDF should look something like this:
How to write an invoice email
Email is the most popular way to send an invoice to a client, but you can’t just attach a bill and hit send.
A clear subject line and short, professional note tell the client what the email contains, so it doesn’t get ignored or wind up in a junk folder.
Just like an invoice, you can create an invoice email template to reuse for each client. It should include:
- A subject line
- A polite greeting
- A brief message
- An invoice attachment or link
- Payment instructions
- A friendly sign off
Invoice email template
You can write your own invoice email by customizing this invoice email template:
Subject line: Lawn mowing invoice – Lucky Lawn Care
Hi [customer name],
Thanks for letting us take care of your lawn this week! We’ve attached your invoice for [amount], which is due [payment due date].
You can make a payment by [following this payment link, sending an e-transfer, credit card, etc.]. If you have any questions, please don’t hesitate to contact us at [email address] or [phone number].
Thank you for your business!
[Your name and company name]
Best practices for writing service invoices
Now that you know the basics of how to make an invoice, here are some invoicing best practices to add to your invoicing strategy:
- Send digital invoices. When possible, send online invoices to clients. They’re easier to track, store, and resend, and much harder to lose than a paper copy.
- Use 14-day payment terms. Prevent outstanding invoices by shortening the time between when you send an invoice and when payment is due to 14 days. This window still gives the client time to pay, but prevents you from having a lengthy payment cycle.
- Offer multiple payment options. The more options you offer clients, the easier it is for them to pay you by choosing their preferred payment method, like paying with a credit card or making an ACH transfer.
- Be consistent. Use software or invoice templates to keep your invoices consistent between clients and jobs.
- Set up recurring invoices for ongoing work. If you have recurring jobs, like weekly cleaning or biweekly pool maintenance, set up recurring payment processing to save time, prevent errors, and automate payments.
Create better invoices instantly with Jobber
If you only have a handful of clients, manually creating invoices can work fine. But as your client list grows, it becomes tedious and leaves room for human error, like accidentally using the wrong client name or email address.
Software is a better option for small businesses looking to take the next step in professional invoicing. With invoicing software like Jobber, you can:
- Instantly generate accurate and professional invoices
- Get automatic reminders to send invoices for jobs you’ve just finished
- Track received payments and invoice due dates
- Send multiple invoices at once with batch invoicing
- Set up recurring invoices
- Automatically send invoice follow-ups that remind clients to pay their overdue invoices

Jobber has freed up so much of my time because I can convert jobs into invoices while I’m still in my truck.
And, since invoicing software ensures every invoice includes the essential details for easy payment, it helps you get paid faster and improve cash flow.