HVAC Installation Checklist: Free Template (+ How to Customize for Your Crew)

Key takeaways:
Setting up an effective HVAC installation checklist helps crews prevent mistakes, ensure quality, and keep every installation running smoothly from start to finish.
- Comprehensive checklists cover every stage of the job. From pre-arrival prep and materials to post-install walkthroughs and payments, structured lists help teams stay organized and deliver professional results.
- Customizable templates fit any installation type. Use and adapt ready-made forms for AC, furnace, or heat pump installs, so crews only see the steps that apply to their work, making the process efficient and easier to follow.
- Digital checklists improve consistency and record keeping. Attach lists to work orders, check off tasks in real time, and file completed records for documentation, compliance, and warranty support.
- Including quality control and customer follow-up drives satisfaction. Thorough inspections, clear documentation, and a post-install customer check-in help prevent rework and boost your reputation.
- Stay compliant and protect your business with proper permits and documentation. Following local codes and keeping detailed records safeguards against costly errors and supports future service needs.
For more helpful tips on running a professional service business, sign up for the Jobber Newsletter.
When you use an HVAC installation checklist before and during your heating, cooling, and ventilation system installs, you’ll prevent missed steps and complete the job in less time.
Using a checklist also helps your team reduce the risk of errors, ensure quality control, improve customer satisfaction, and stay compliant with local regulations.
Start by downloading our free HVAC installation checklist form. It covers every part of a job, from inspecting the site to swapping out the system, all the way to getting paid for your work.
Then follow our guide below to learn how to customize your own checklists, use them efficiently at the job site, and take your team to the next level.
Free HVAC installation checklist template (PDF download)
Our checklist template is built to support the full HVAC change-out workflow, from pre-arrival and pre-installation tasks to final testing and customer closeout. It’s printable, editable, and customizable for your business, so your crew can adapt it to the way you work.
What’s in our HVAC installation checklist template?
Our HVAC installation checklist includes multiple task lists that you can use across different job types to standardize installs and keep documentation consistent. Here’s what’s included:
- HVAC installation material list: Verify that your crew has the tools, safety equipment, software, replacement parts, and materials needed to complete the job.
- Pre-arrival and on-arrival checklist: Keep jobs organized with site information, warranty details, and arrival procedures, as well as clear customer communication.
- Pre-install inspection checklist: Review jobsite conditions, inspect equipment, and identify safety concerns.
- New unit installation checklist (all systems): Follow this process for equipment removal, site preparation, system placement, electrical connections, and code-compliant installation practices.
- 24-point AC installation checklist: Complete every step of a residential air conditioning system installation.
- Furnace installation checklist: Cover gas shutoff, venting, combustion air, gas line testing, electrical connections, thermostat setup, startup, and heating performance verification.
- Heat pump installation checklist: Install and test both indoor and outdoor heat pump components.
- HVAC post-installation checklist: Confirm system performance, record startup readings, document the completed installation with photos, and leave the jobsite clean.
- Post-install customer check-in checklist: Take customers through their new system, discuss regular maintenance plans, collect payment, send follow-up communications, and request reviews.
How to use editable online checklists
Once you’ve downloaded our free HVAC installation checklist, make it part of your standard install process. Here’s how:
- Attach it to work orders. Before dispatching the job, attach the checklist to the work order. This way, the install crew can access it from their mobile device or print a copy for the jobsite. When every technician follows the same process, it’s easier to maintain quality across multiple crews.
- Use it on the job. As the installation progresses, techs can check off tasks in real time rather than trying to remember at the end of a long day. This ensures you don’t miss anything, which helps prevent callbacks.
- File the completed checklist. Once the job is done, save the finished checklist to the customer’s record in your HVAC CRM. Having a documented record of inspections and completed work helps with warranty claims, quality control, customer questions, and future service visits.
Need to customize the template? Make a copy and adjust it to fit your workflow. Some HVAC companies create separate checklists for:
- AC replacements
- Furnace change-outs
- Heat pump installations
- Light commercial jobs
That way, installers only see the tasks that apply to the equipment they’re working on. This keeps the process faster and easier to follow.
How to create your own HVAC installation checklist in Jobber
Want to edit, customize, and share your HVAC installation checklist with your customers or team? With Jobber, you can turn a template into a reusable checklist that supports every install. Here’s how:
- Duplicate the template and open it in Jobber. Start with a base form, then copy it so you can edit the version your team uses most often.
- Add custom line items. Use Jobber’s checklists to build in the exact steps your crew needs, such as equipment setup and inspection points.
- Assign the checklist to the right job type. Create separate versions for AC, furnace, or heat pump installs so techs only see the tasks that pertain to that job.
- Have techs complete the checklist in the mobile app. Your team can check off tasks from their mobile devices while they work, keeping the process consistent in the field.
- Auto-attach it to the customer record. Save, download, or share the completed checklist once the job is done so it becomes part of the customer’s file. It also serves as digital proof of work.
Create custom site inspection checklists in Jobber to help standardize installs, document the work, and share a professional record with customers after the job is complete.
Having Jobber has enabled us to efficiently and effectively run everything.
There is only so much you can handle and only so much that you can grow into when you’re a professional business operating things in your mind.
What to include in your HVAC installation checklist
You have important work to do before, during, and after every install. Here are the sections you should include in your installation checklists—and questions to ask when creating these checklists.
1. HVAC installation material list
Before you even leave the shop, make sure you have all the top HVAC tools and materials needed to complete the day’s HVAC installation jobs. Your HVAC installation material list should include:
- Any hand tools, power tools, and specialized tools you’ll need to get the job done (e.g., pipe wrench, screwdrivers, power drill, power saw, multimeter, HVAC/R thermometer)
- Any safety tools needed to complete the job safely (e.g., PPE, LOTO devices, voltage tester, safety harness)
- Your business phone or tablet, equipped with your preferred HVAC software
- Basic spare parts that you think might be needed, based on the job requirements (e.g., fuse, capacitor, furnace filter)
- Making sure the vehicle is loaded with all the necessary tools and parts (and nothing is left behind in the shop)
2. Pre-arrival and on-arrival tasks
A good arrival checklist gets you to the job site faster with all the tools you need. This checklist benefits your customers, too, by keeping them informed and prepared for your arrival.
Build your pre-arrival and on-arrival checklists by answering these questions:
- Does the customer already have an estimate for the job with your HVAC service pricing?
- Do your customers or dispatchers send you notes and photo attachments about their existing HVAC units beforehand?
- Will you need to collect information about the customer’s property while onsite? Or is it stored in your client management software (CRM) before the job starts?
- How will you share new unit warranty and service warranty information with the customer? Do you include warranty details in your HVAC estimates?
- Who sends appointment reminder emails to your customer before the job begins (e.g., installer, dispatcher, or service manager)?
READ MORE: HVAC dispatching tips to improve routing and communication
3. Pre-install inspections
Inspect everything at the job site—including the workspace, existing HVAC unit, and the new unit—so you know you can safely start the installation. As part of your pre-install checklist, your team should:
- Do a site safety inspection. Your work environment should be safe for you and the customer’s property. For example, keep combustible materials far from the furnace, and lay down a drop cloth to protect wood floors and carpets.
- Troubleshoot the existing unit for damages, leaks, or other issues that mean their system needs repairs instead of replacement. Use an HVAC inspection checklist for troubleshooting existing equipment before replacement, as well as to find any issues that might have been missed during the customer’s last HVAC service call.
- Inspect the new unit to make sure there are no loose parts or shipping damages. There should be room in your checklist to report any faults so you can contact your distributor or office immediately.
4. New unit installation checklist (all systems)
Every HVAC unit has different installation steps, but there’s always prep work involved in the removal, placement, and wiring of a system. Answer these questions in your checklist, no matter what you’re installing:
- Safety tasks: What do you need to remove, shut off, follow lockout/tagout (LOTO) procedures, and unplug before you start removing HVAC equipment? This could include shutting off the power supply, disconnecting electrical wires, and evacuating the refrigerant from the air conditioner.
- Removal and preparation: What components of the HVAC system need to be removed, replaced, newly built, heat protected, or cleaned? For example, this could mean adding a new composite pad for an AC installation, disconnecting upper ductwork, and clearing out condensation lines.
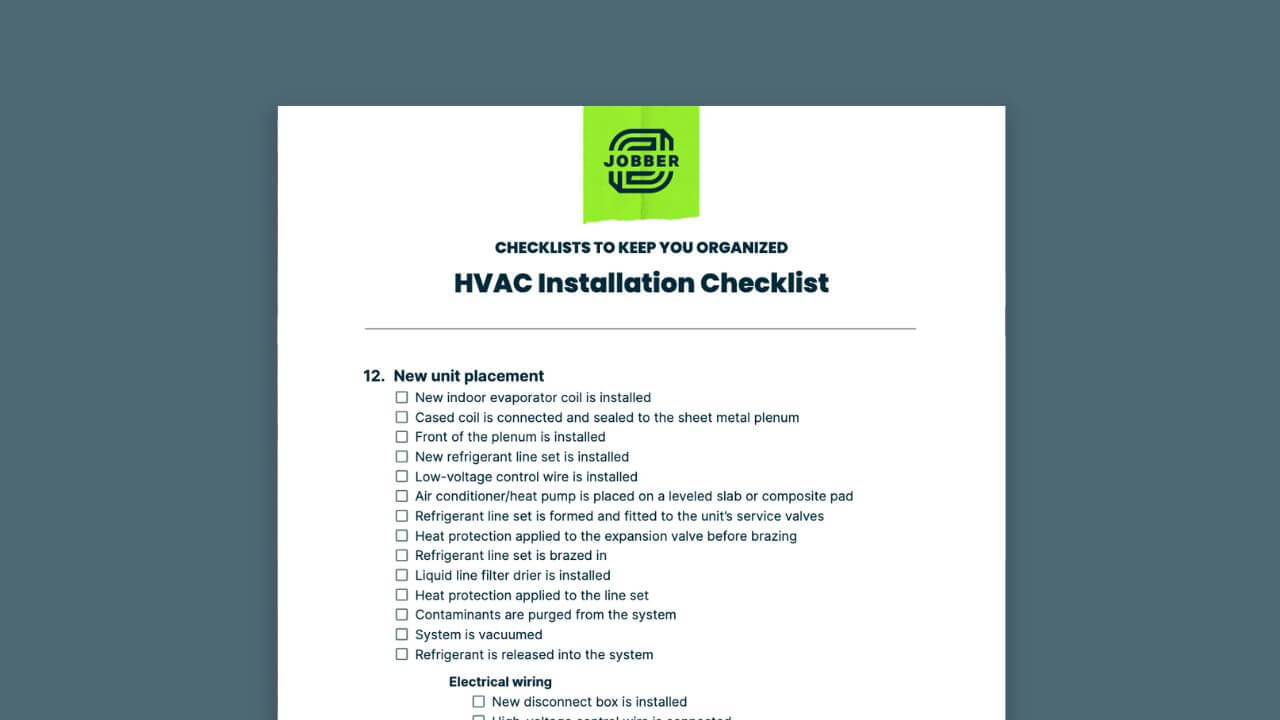
- New unit placement: Which components of the new system should you install in what order (e.g., evaporator coil, refrigerant lines, heat exchanger, programmable thermostat)?
- Electrical wiring: What regional and federal regulations do you need to follow for professional installation (e.g., National Electrical Code, Canadian Electrical Code)?
Residential installs tend to be more straightforward, while commercial jobs usually require more documentation, coordination, and verification steps.
Commercial systems may also involve multi-zone equipment, rooftop units, and additional access or safety considerations, so it’s a good idea to leave room in your checklist for job notes.
5. 24-point AC installation checklist
You’ll most likely be installing a lot of air conditioners, so it’s a good idea to have a comprehensive checklist that helps you complete the task quickly and safely. Here’s what your AC installation checklist should include:
- Shut off power at the breaker and verify the system is fully de-energized.
- Apply lockout/tagout procedures before starting removal.
- Evacuate refrigerant according to required safety and environmental procedures.
- Remove the disconnect box and flexible electrical conduit.
- Disconnect and remove the existing indoor evaporator coil and refrigerant lines.
- Disconnect the sheet metal plenum and remove any remaining components that won’t be reused.
- Confirm the new unit will fit on the slab or mounting location.
- Prepare the installation area by cleaning and leveling as needed.
- Set the new AC unit or outdoor condenser in place.
- Install the evaporator coil or cased coil.
- Connect and secure the refrigerant line set to prevent refrigerant leaks.
- Install the low-voltage control wire.
- Install the new disconnect box.
- Complete all high-voltage and low-voltage electrical connections.
- Connect thermostat wiring and verify control setup.
- Follow the applicable regional and federal electrical codes.
- Install the condensate drain line with secure tubing or piping.
- Confirm the trap is installed correctly and the overflow safety switch is in place.
- Seal all penetration points to prevent air or water leaks.
- Mount fans securely and confirm proper alignment.
- Verify all water connections and valves are installed.
- Connect the valves to the main control panel.
- Start up the system and confirm proper operation.
- Test airflow, drainage, and cooling performance before sign-off.
6. Furnace installation checklist
It’s also a good idea to have a checklist just for furnaces. From safety to starting the system, your furnace installation checklist should include these steps:
- Shut off the gas supply before beginning removal.
- Shut off electrical power at the breaker and verify the unit is de-energized.
- Apply lockout/tagout procedures before work begins.
- Remove the old furnace and disconnect any remaining gas and electrical connections.
- Inspect the installation area and confirm the new furnace will fit properly.
- Prepare the platform or cabinet space for the new unit.
- Install or position the new furnace in the correct location.
- Connect the venting system according to the manufacturer’s requirements.
- Confirm vent termination and clearances meet applicable code and manufacturer specifications.
- Verify combustion air supply for the new furnace to support indoor air quality and safe operation.
- Install or inspect the heat exchanger assembly.
- Connect the gas line to the new furnace.
- Perform a gas line leak test before startup.
- Complete all electrical wiring connections.
- Connect the thermostat wiring and confirm control compatibility.
- Install and secure the condensate drain if the system requires one.
- Check all seals, joints, and access panels before startup.
- Restore gas and electrical service to the unit.
- Start the furnace. Confirm ignition, flame operation, and airflow.
- Test the system for safe operation, heating performance, and customer-ready finish.
7. Heat pump installation checklist
Heat pump installs involve both heating and cooling components, so you’ll want to cover every step from setting the equipment to testing performance. Your heat pump installation checklist should include these steps:
- Shut off power and verify the system is fully de-energized.
- Apply lockout/tagout procedures before starting removal or installation.
- Remove the existing equipment and prepare the installation area.
- Confirm the outdoor unit location has proper clearance, airflow, and a stable mounting surface.
- Set and level the outdoor heat pump unit in place.
- Confirm the indoor air handler location is ready for installation.
- Install and secure the indoor air handler.
- Connect the refrigerant lines between the indoor and outdoor units.
- Braze, seal, and insulate refrigerant line connections as required.
- Install the condensate drain and confirm proper drainage from the air handler.
- Complete all electrical wiring connections for both units.
- Connect the thermostat and verify control wiring.
- Verify auxiliary heat installation and configuration.
- Check the defrost cycle setup and control operation.
- Confirm all access panels, fasteners, and seals are secure.
- Restore power to the system.
- Start the heat pump and verify cooling operation.
- Test heating mode, auxiliary heat, defrost function, and system performance.
8. HVAC post-installation checklist
A post-installation checklist helps you wrap up the job smoothly. That includes testing to make sure the new HVAC unit works properly, closing out the job, and leaving a great impression on the customer so they leave a good review and book your services again.
Here’s what your post-installation checklist should include:
- Cycle the HVAC system to confirm operation.
- Listen for unusual noises and test the thermostat.
- Record pressure and temperature readings.
- Note refrigerant charge, suction and liquid line conditions, and amperage readings for motors and fans.
- Take photos of the completed install and any important equipment details.
- Clean up the job site and remove all trash, materials, and protective coverings.
- Wipe down surfaces and leave the area in customer-ready condition.
If somebody will [leave] my house a mess, I won’t think positive things about the person or business.
Our technicians wipe everything afterwards, leave it as neat as possible, and then they have to send me pictures, always.
9. Post-install customer check-in
The job isn’t done until the customer knows it’s done. You’ll need to complete these last few tasks to wrap up the job, get paid, and move on to the next site:
- Do a system walkthrough to explain what’s installed and show your customer how to operate and maintain their new HVAC system (e.g., replace the air filter regularly for good air circulation) to keep it healthy.
- Offer ongoing maintenance. Take the opportunity to upsell the customer and see if they’re interested in an HVAC service contract. Not every customer has the time to maintain the new system themselves, and this could mean recurring revenue for your business.
- Invoice the customer and collect payment. In Jobber, you can convert an estimate into a professional HVAC invoice, complete with accurate job details and convenient payment options. That way, the customer can pay on the spot and you can get to the next job more quickly.
- Send a follow-up email. After you receive payment, thank the customer for their business and ask them for a review. Jobber Reviews lets you send automated emails, request reviews from preferred customers, and track your Google rating and latest reviews, all from your dashboard in Jobber.
After you do an install or repair, follow up with an email.
Follow-ups after a quote or a service help you look professional. Normally I get review feedback through Jobber’s email follow-up tool. I ask clients for a rating between 1–10 and they can add comments.
Permits, codes, and documentation for HVAC installs
A successful install doesn’t end when the system starts up. Before your crew arrives on-site, confirm if the project requires a permit.
Requirements vary by city, county, state, and job type, so check with the local authority having jurisdiction (AHJ) to avoid failed inspections, project delays, fines, and unhappy customers.
Your installation process should also follow applicable mechanical and electrical codes. In the United States, that typically includes the National Electrical Code (NEC). In Canada, it’s the Canadian Electrical Code (CEC).
Commercial projects may involve additional inspections or commissioning requirements, so it’s worth reviewing those details before work begins.
Once the install is complete, collect these project documents:
- Equipment warranties
- Maintenance records
- Inspection approvals or certificates
- A completed HVAC installation checklist
- The final customer invoice
Good documentation protects your HVAC business. If a warranty issue comes up six months later, or if a customer asks what was included in the job, you’ll have a record of everything. It’s one of the simplest ways to reduce disputes and support any warranty claims.
Why you need an HVAC installation checklist
Using an installation checklist protects you from missing steps during an HVAC system change-out. Even the most experienced HVAC technician or installer can forget things, especially when you’re tired after a long day.
Using an install checklist also helps you:
- Keep work consistent across installers. When you’re running an HVAC business, you don’t have time to check every job yourself. Equipping your installers with checklists ensures the job is done right every time, helps avoid costly callbacks and customer complaints about flawed installations, and makes it easier to train new hires.
- Stay compliant with job requirements and code-related steps. A checklist helps your crew follow the right process on every install. It reduces the risk of missing important regulatory or documentation items.
- Impress your customers and win their trust. When you finish an install, give your customers peace of mind by showing them all the tasks you’ve checked off. Checklists show that you’re an organized, professional installer who cares about doing quality work.
- Get to the next install faster. Checklists keep you on track and can save you from time-consuming missteps. Reduce the risk of rework, and you’ll avoid getting stuck on one property and delaying your day’s schedule.
READ MORE: Better scheduling led to this HVAC business’s most profitable year
You need strong operational systems in place.
Jobber [helps] carry the weight of time management for you as the business owner.
Originally published in January 2023. Last updated on June 23, 2026.
Frequently Asked Questions
-
Safety should be your technicians’ top priority during an HVAC installation. Make sure they’re following safety best practices and regulatory guidelines like the following:
1. Wear PPE (e.g., gloves, safety glasses) to avoid injury.
2. Turn off power to the system before beginning work.
3. Lift any components safely using specialized lifting equipment, if needed.
4. Use a safety harness or fall protection equipment if working at heights.
5. Make sure all rooftop and outdoor equipment is properly anchored.
6. Ensure good ventilation while working and monitor hazardous gases.
7. Test for gas leaks during and after installation.
8. Handle refrigerant according to regulatory restrictions.
9. Make sure insulation materials aren’t blocking airflow or touching heat sources.
10. Check that all electrical wires are connected, covered, and properly grounded.
11. Label control panels, circuits, and switches for easy identification.
12. Confirm that emergency shutdown procedures will work if they’re initiated.
13. Write down any changes to the system during installation and share them with the customer. -
It’s a good idea to use a checklist for HVAC installation jobs, whether you’re just starting an HVAC business or you’ve been operating for years. Here’s why:
• Regulatory compliance: Your business needs to meet certain industry standards. An HVAC installation checklist can help by pointing out all the tasks that keep your installs compliant with regional and federal regulations.
• Improved quality: It’s easy to miss steps during a job, especially when the installation process is long and complicated. When your technicians use an install checklist, they’ll never forget a step, and the job will be done properly.
• Safer installs: Your technicians work with gas, water, and electricity. Using a checklist helps them follow safety procedures, reduces the risk of safety incidents on the job, and protects the client from improperly installed systems.
• Higher performance: You can use installation and inspection checklists to evaluate your technician’s job performance—and determine whether they should get a raise or promotion.
• Greater efficiency: When a technician knows the process they need to follow, they’ll work faster and smarter to get the job done. That means you can fit more jobs into the work week.
READ MORE: Top HVAC apps to boost productivity -
Most tasks on your HVAC installation checklist are related to quality control, so following a checklist will help maintain high standards. That said, your checklist should specifically include QC tasks like:
• Inspecting the site before starting work to ensure there isn’t any debris that could cause damage to the equipment
• Checking all your ductwork and electrical connections to ensure there are no leaks or safety concerns
• Testing the new system to make sure it’s performing as expected
• Making sure the current thermostat is compatible with the new unit
• Showing the customer how to maintain the system over time (or setting up a service contract to maintain it for them) -
On average, expect to spend 1–5 days installing an HVAC unit, whether it’s a furnace, air conditioner, chiller, or other system. Residential jobs will take less time, while commercial jobs with larger equipment can take much longer.
-
That depends on where you operate your HVAC business and what local, regional, or federal regulations are in place. Some areas require you to have a permit before you can complete any HVAC installations. Always check with the appropriate government department before you accept an HVAC installation job.
-
When you’re installing an HVAC unit, make sure to steer clear of common errors like:
• Undersized or oversized units that don’t meet the needs of the space
• Faulty ductwork with improper sealing and placement
• Poor electrical connections, causing low performance and creating safety risks
• Incomplete insulation and sealing, which can cause damage and increase energy bills
• Not testing the system to make sure it’s properly set up and calibrated -
When you’re finished with the installation, make sure your customer has copies of the following documentation:
• Product and service warranties in case of future issues
• Maintenance records so future technicians know what issues were identified and resolved
• Inspection certifications to prove the system is compliant with all requirements
• A copy of the completed checklist so the customer knows what tasks were completed
• Your service invoice so you can get paid for your hard work